School Project | Fall, 2024 | Role: UX Designer
Table of Contents
Outcome
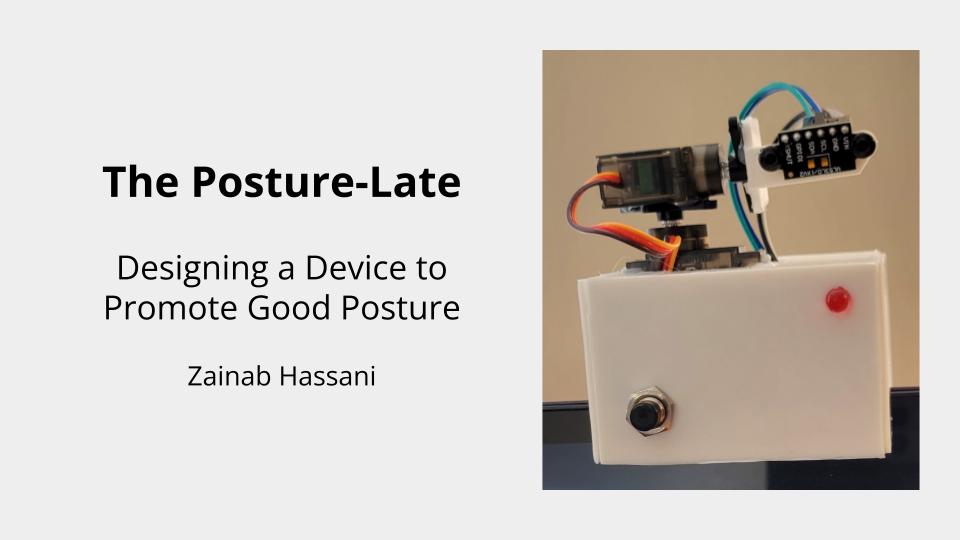
This project resulted in the creation of a 3D-printed, customizable device designed to promote good posture in users working at a computer.
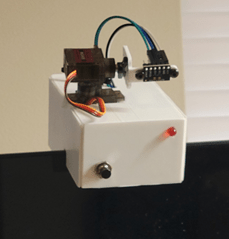
This prototype consisted of the following components
- A 3D-printed shell
- An Arduino Nano microcontroller to coordinate the Posture-Latte’s electrical components
- Two PWM servo motors to control the pan and tilt of the distance sensor
- A VL53L1X time-of-flight distance sensor
- A momentary tactile push button
- An LED indicator
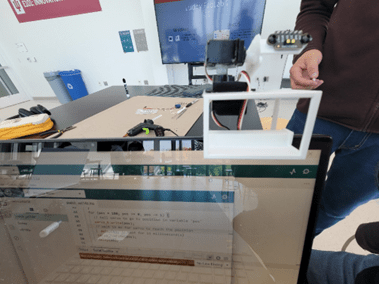
The prototype consisted of a 3D-printed shell, and an Arduino nano electrical component that gave users feedback on how close they were to their computer monitor using a time-of-flight distance sensor.

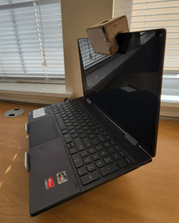
The completed Posture-Late with its visible components which include its LED indicator, push button, servo motors, and distance sensor.
The Challenge
The challenge of this project was to build a a device that helps users maintain good posture when seated at a computer.
The prevalence of personal computers in the professional and academic workspace brings with it the possibility of developing many potential health issues. These issues are essentially prevalent in those who lead a more sedentary lifestyle, and those who use computers for extended periods of time.
Chief among the risks of extended computer use is the development of musculoskeletal issues caused by poor posture. This occurs when the user’s upper body (e.g., the back and shoulders) are unnaturally positioned for extended periods of time. This awkward posture can lead to pain and discomfort in the short term, lead to lasting damage down the road.
The Team
While this was a solo project, I would not have been able to build this device without the help of:
- Matthew Francisco – course lecturer
- Aided 3D-print production
- Helped create and trim down Arduino code.
- Jake Peacock – animal Informatics and cognitive Science PhD
- Instrumental in helping me set up the electrical components of the Posture-Late prototype
The Process
Initial Sketches
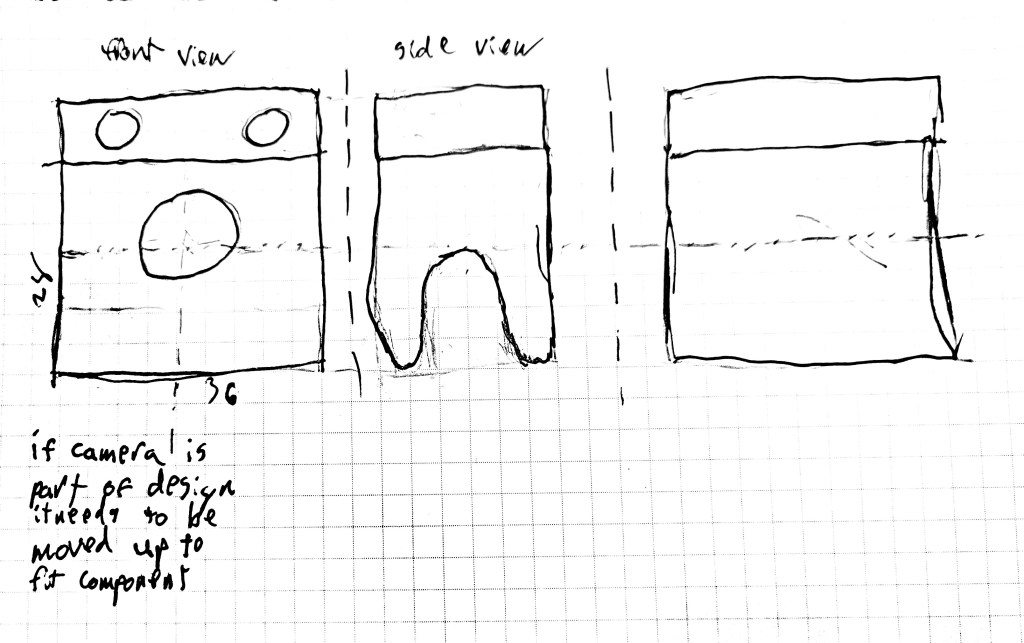
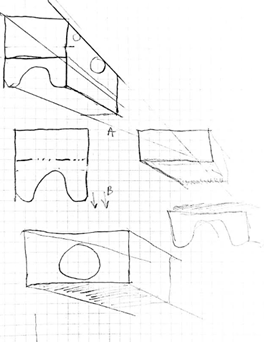
Initial sketch of the Posture-Late.
Initial sketches for the Posture-Late were basic, showcasing a small, rectangular design that sat atop the user’s computer. At this stage, necessary specifications were unknown.
While I did have the idea of collecting input using a camera, this was later scraped in favor of a system that would better ensure user privacy.

In this early design stage, I experimented with different dimensions for my prototype. Along with a camera, early iterations of my prototype included an LED light to inform users if they were too close to the device. However, at this stage, there was no method for the user to manually set a default distance.
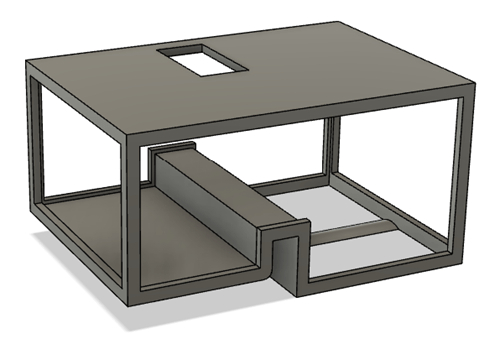
Cardboard Mockup
To get a better idea of what my prototype would look like as a tangible object, I created a cardboard mockup. This allowed me to test its dimensions, and to experiment with the shape and size of various components of the device.
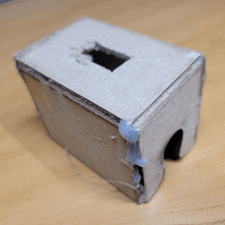
Creating a cardboard mockup enabled me to better understand the physical requirements of my prototype. It also allowed me to begin visualizing how electrical components might fit inside it, and how I may need to adjust the size of my prototype to accommodate those electrical components.
3D Models
First Iteration
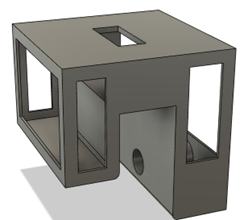
The first iteration of my design was larger than it had to be, due to me not knowing the minimum space required to fit the Posture-Late’s electrical components.
Additionally, the size disparity between the the front and back of the device made the device unbalanced. to Ensure that the Posture-Late could sit on the top of the user’s computer, on its own, I added a hole to the back of the device. This screw would help adjust the positioning of the Posture-Late onto of the user’s computer screen.
This aspect of the Posture-Late would later be scrapped in favor of a a custom-made approach where each Posture-Late was designed to fit on top of a single monitor.
Second Iteration
The second iteration of the Posture-Late included several improvements that brought it closer to the finished product.
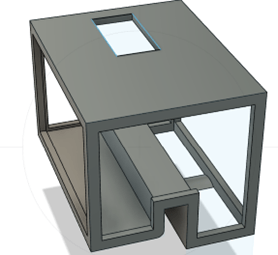
Reduction of the overall size of the prototype was done by reducing the width of the central slot for a tighter monitor grip, and by reducing the overall size of the device.
This removed the need to include a hole for an adjustment screw. The slot in which the pan servo motor would fit through was also readjusted for a better fit.
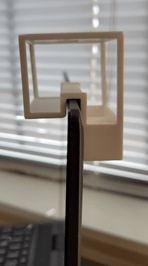
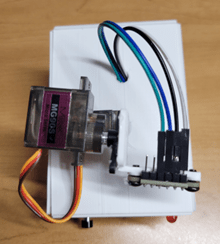
Posture-Late prototype with servos and
3D-printed distance sensor arm.
Additionally, the central hole for the panning servo motor was adjusted to be on the left side of the device. This made it so that the distance sensor, which protruded out of the Posture-Late, appeared centered. The height of the device was also increased to give more room for the servo motor. This was done by increasing the height from the top of the device as to not infringe upon the user’s monitor space.
A 3D printed arm was also created for the distance sensor. In this iteration of the design, the distance sensor used was a short-range sensor, unsuitable for user posture detection. Still, it aided the initial design of the device and allowed me to experiment with the code used to control it.
Final Iteration
The final iteration of the Posture-Late mainly included modifications to the overall size of the device to better accommodate its electrical components. This involved increasing the width of the device to accommodate wiring, and other components.
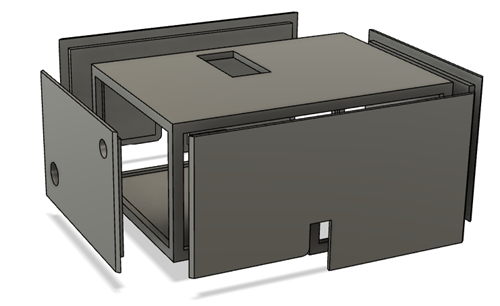
After finalizing the Posture-Late shell, paneling was created to contain the electrical components and to make the device appear more finished. Two holes were created on the front-face of the device for the LED and the button. An additional hole was added to the top of the device, after printing, to allow the device’s wires to pass through.

Usability Testing
Following the creation of the finalized prototype, a usability test was developed to evaluate the effectiveness of the Posture-Late, and to gain critical feedback about its use.
The main objectives of the user test were as follows:
- Assess the accuracy of the pan/tilt functions.
- Evaluate effectiveness of the distance sensor capture rate.
- Determine if the Posture-Late accurately
detects slouching.
Usability testing revealed the following points:
- A person’s posture can vary from moment to moment. This meant that the Posture-Late was constantly nagging the user if they were within range of the sensor.
- Users found the device to be bulkily, and would prefer to interact with a more more slim, less intrusive device.
- Users thought the red light indicator used was too harsh, and would prefer a more subtle color used.
Additional observation revealed that:
- The Posture-Late could not detect slouching if the user was slouching backward against their seat.
- While the code works as expected, the Posture-Late experiences an output delay if the device is tilted back too much. This means that the device will not work properly if the user’s computer is tilted back too far.
Skills Learned
By doing this project, I learned how to create 3D prototypes for user testing. I also learned how cardboard prototypes can serve as low-fidelity 3D models to help physicalize design, and visualize how all the different parts will fit together.
Working with my peers further demonstrated the importance of collaborating with people with different specialties to ensure the viability of my design.
